By Amy Vickrey, MSE


After you have  gathered your documents, written your goals, and  decided on your accommodations, you are ready to start working towards those goals, right? Let’s look at some frequently asked questions.


But how do I know what progress is made and when my child reaches his/her goal?

Tracking goals is just as individual of a process as the actual goals. Some goals can be tracked through a portfolio of work that shows the student progress over time (be sure to date the work sample and write down any accommodations you have used to help your child complete the work). Other times, a tally sheet or checklist might be useful. The most important thing to do is document it so you can see the progress!

What happens if my child is not making progress?
If your child is not making progress after working on the goal for a significant period of time (for some children this may be a few weeks, but for others it may be a few months), look at how you can change your approach to the goal or offer more support so that your child can achieve the goal with help. Check out my article on levels of support:  Is it cheating when I help my homeschooled child? Over time, you can gradually lessen the support and help your child be more independent with the goal. You can always re-evaluate the goal and change it if you need to make it more achievable. The same goal can also carry into a second year.

What happens if my child progresses quicker than I expected?
First, you celebrate!!! Then, you write a new goal for the next skill you want him/her to accomplish. Even though these are commonly referred to as “annual goals,” children grow at different developmental rates and at different times. Sometimes by focusing on a skill, your child will pick it up quicker than you expect. In that case, move on to what comes next, but always take time to celebrate!

How do I report these goals with report cards?
If you are keeping grades or report cards every 6 or 9 weeks, you can write a quick summary for each goal and/or the objective. This will also help you summarize all the data that you have gathered and give you a nice single page to keep as documentation at the end of the year. This will help you look at where you need to set goals for the next year.

Check out our  IEP Tools Pinterest board or check out these links for more ideas:
SMART IEPs 
Setting Annual IEP Goals: What You Need to Know
IEP Goal Tracking Sheet
 Progress Monitoring for IEP Goals


Did you know SPED Homeschool is 100% donor funded?

Donate today


By Tracy Criswell

Many parents hear the word assistive technology and automatically think that it will be expensive. This is not the case though. According to the IDEA (Individuals with Disabilities Education Act), assistive technology is any item, piece of equipment or product system, whether acquired commercially off the shelf, modified, or customized, that is used to increase, maintain, or improve the functional capabilities of children with disabilities. There are two types of assistive technology: low tech assistive technology and high tech assistive technology. For this article, I will be focusing mostly on low tech assistive technology, but will briefly address high tech assistive technology.

Low Tech Assistive Technology Explained
Low tech assistive technology, according to Tools for Life, are devices or equipment that do not require much training, less expensive, and does not have complex features. For many homeschooling families, low tech assistive technology is an inexpensive item that can be used to help educate their children with a variety of needs. I have personally used low tech assistive technology with my three youngest children with ADHD, learning disabilities, sensory processing disorder, and anxiety. In reality, you may be already using a different type of low tech assistive technology without knowing it.

Examples of Low Tech Assistive Technology
You might be wondering, what are some examples of low tech assistive technology. Things as simple as using a dry erase board and marker for the student to write their answers to a math problem or an exercise ball to bounce on while reading or completing other homeschool tasks to help your child focus are both considered examples of low tech assistive technology. The great thing about low tech assistive technology is that the item does not cost a lot of money. As a homeschooling mother of four, every penny counts.

Here are more examples of low tech assistive technology that can be used while homeschooling your child:

  • Large font worksheets
  • Audiobooks
  • Use of a binder as a slant board (to elevate the paper so it is at a better level for the child to see)
  • Rubber stamps with letters and/or child’s first and last name and inkpad (to use for spelling, etc.)
  • Refrigerator magnetic letters to use for spelling words
  • Stress balls for children with anxiety and/or needing sensory input
  • Sandpaper to place under writing paper to receive sensory input while writing (and also very helpful for children that place too much pressure on their pencils while writing)
  • Pencil grips
  • Raised lined paper or highlighted paper
  • Graphic organizers,
  • Reading guide highlighter strips
  • Highlighter tape to assist with note taking
  • Colored transparencies to use for reading
  • Sentence strips (you can make your own or purchase them)
  • Grid paper for math (assists children with making sure their numbers are in neat rows while doing math)
  • Kitchen timer
  • A visual schedule
  • Velcro that can be used for folder activities or visual schedules

There are many more examples of low tech assistive technology items, but these are items that I have used either with my own children or students that I have tutored.

High Tech Assistive Technology
In addition to low tech assistive technology devices, there is high tech assistive technology. High tech assistive technology devices, according to Tools for Life, are the most complex devices or equipment, that have digital or electronic components that will possibly require training and effort to learn how to use them as well as cost the most money. This type of assistive technology is normally used to help with communication, mobility (getting from place to place), reading, safety, etc.

The following are some examples of high tech assistive technology:

  • Electronic augmentative communication devices (technology that is used for children that are nonverbal to communicate with others)
  • Hearing aids
  • Electric wheelchair
  • Computer
  • Various computer programs (text to speech, voice recognition, word prediction, etc.)
  • Electronic home alarms (provide a different way to let those with hearing or visual impairments know when there is a fire, someone at the front door, someone calling)
  • iPad


More About Assistive Technology
Assistive technology can be very helpful when we homeschool children with special needs. Low tech assistive technology is very affordable and can be used in a variety of ways. This is a huge plus when it comes to homeschooling. It is also important to note that there are ways to obtain high tech assistive technology.

In some states, if your child is a dual-enrolled homeschool student with special needs, the school can provide the high tech assistive technology. Other options to obtain this type of assistive technology is to check with your insurance, check with Medicare (if your child is on Medicare), contact the assistive technology manufacturer, etc. It is wonderful as a homeschooling parent of a child with special needs to have so many options. Every day, it seems, there are new forms of assistive technology being used and developed. 


Also, make sure to check out the SPED Homeschool Assistive Technology and  Ed Tech Pinterest boards to discover more ways you can implement both low and high tech assistive technology in your homeschool.


Did you know SPED Homeschool is 100% donor funded?

Donate today


By Jennifer Cullimore, The Therapy Mama

I don’t know about you, but I love fresh starts. I have always loved the beginning of school, whether it was traditional or homeschooling.

There’s something about the smell of fresh paper and a new box of crayons that just puts me in the mood for learning. However, as a homeschooling mom, sometimes I’m just not ready mentally to tackle everything at once. 

Let’s face it, when you are the parent, teacher, support staff, and principal all rolled into one, the task may seem daunting. What can you do if you are just not quite ready to begin the new year?

1) Sit down and take a few minutes to set some goals for the new year.
Some years I’ve found myself without money to get new shiny curriculum or many supplies. But one thing that doesn’t cost anything is new goals. What do you hope to accomplish this year? What is God speaking to you about your child? What can you pray and model this year? These can include goals for you or your child. It’s refreshing to get an idea of where we are going. Check out also what Dawn Spence shared in her article Unlimited Homeschool Expectations for further help in this area.


2) Remind yourself of your resources.

Sometimes it can be particularly overwhelming to homeschool a child with special needs. We can get too focused on deficits that we don’t see the good. Before you get into the thick of things, make out a list of friends, agencies, programs, and any other resources that you may need to contact to ask for help. Don’t forget to add God to the list. He has your back and has equipped you with what you need for your child. He will guide and direct you.

3) Fill up your cup!
It can be exhausting and draining to manage everything. If you are already feeling drained, take some time to refresh yourself. Sometimes you can’t get away, but try to take a few moments for yourself. Call a friend and chat, read something encouraging, or listen to a homeschool podcast that will fill you up. I usually have some prep work to do for school like copying, laminating, and cutting. I put on podcasts or homeschooling YouTube vlogs while I’m working. It’s amazing how rejuvenating it is just to hear another parent share. Do you need some more encouragement in this area?  Check out my article You Can’t Pour From an Empty Cup.

4) Have a “soft start.”
You don’t have to begin everything at once. You don’t have to be prepared for the whole year to begin something. Sometimes it just works better to start one or two new things at a time. Add in another every couple days and you will soon be up to a full schedule. Not only is this less stressful for you, but can also be better for children who struggle with transitions or trying new things.

5) Give yourself grace!
If you are not ready, the beauty of homeschooling is that you can schedule it for a time when you are. If life events have occurred, change things around. You are not bound by someone else’s schedule. Rejoice in the freedom that you can do what works for your family.

Most importantly, have a great year! Remember this: “For I know the plans I have for you,” declares the Lord, “plans to prosper you and not to harm you, plans to give you hope and a future.” (Jeremiah 29:11 New International Version (NIV))

May this year be packed full of learning, growth, joy and progress.

Looking for another way to connect? Join our Facebook Support Group or follow our Podcast or YouTube channel


Did you know SPED Homeschool is 100% donor funded? 

Your contributions keep our ministry running! 

Donate today on GuideStar

(all donations are tax-deductible)


Did you enjoy this article?

React, share, and comment with the tools below


By Amy Vickrey, MSE

After you have done preparation before, and then you have written your child’s IEP goals, you need to think about the tools your child needs to reach those goals. That is where accommodations and modifications come in. (To learn more about accommodations and modifications, check out this article by Dawn Spence.)


Accommodations

Accommodations are simple tools that help your child work at their level without changing the curriculum. Some examples:

Time – extra time

  • Extra day
  • Breaking up work over the day in small pieces or over several days


Alternative Scheduling – giving more days to finish their project

  • Allowing students to start later in the day
  • Allowing your child to pick his schedule (provided everything is completed)


Change of Present Setting – providing a quiet place to complete assignments or tests

  • Working outside
  • Working in a beanbag
  • Working on an easel


Change of Presentation – changing the way you present the material

  • Using video
  • Making it hands-on
  • Using an app or computer program


Varying Response Method – changing how answers are provided

  • Orally
  • While moving
  • Through games


Cues and Supports – visual supports for schedule or academic subjects

  • Visual schedule
  • Planner
  • Checklist
  • Grading rubric
  • Multiplication chart
  • Calculator*
  • Communication board or app*

*some states may consider these items assistive technology


Modifications

Modifications, on the other hand, are ways in which you change the actual curriculum to bring it down to a lower level for the student. This may mean working on a lower level of math or reading to reinforce skills not yet achieved.

Presentation of Material – this would be using special education materials or curriculums such as Simply Classical


Adapted Materials – simplifying content and vocabulary. Instead of introducing 10 vocabulary words you would hold the learner accountable for only 2. Also, using leveled or simplified texts for subjects like science or social studies.


Grading and Testing Altered – instead of testing the whole lesson, you would choose certain parts that are important for the learner to grasp. Check out this article on strategies for grading.

Considerations 
Here are some additional considerations when selecting accommodations and modifications:

  • Plan to document, Look at what you use all the time, consistently, so you can incorporate this documentation into your everyday schedule.
  • Critically review what accommodations and modifications are necessary for your child to achieve their goals and their potential?
  • If you are going to be testing, either by choice or by state requirement, what is allowable to accommodate or modify on your child’s grade level on the test?


Check these links for more ideas:
The difference between Accommodations and Modifications 
Common Classroom Accommodations and Modifications
Examples of Accommodations and Modifications
Supports, Modifications, and Accommodations for Students
School Accommodations and Modifications

And, also make sure to join in the SPED Homeschool on-going conversation about special education homeschooling that happens in our Support Group  and in our weekly Facebook Live broadcasts


Did you know SPED Homeschool is 100% donor funded?

Donate today


By Amy Vickrey, MSE

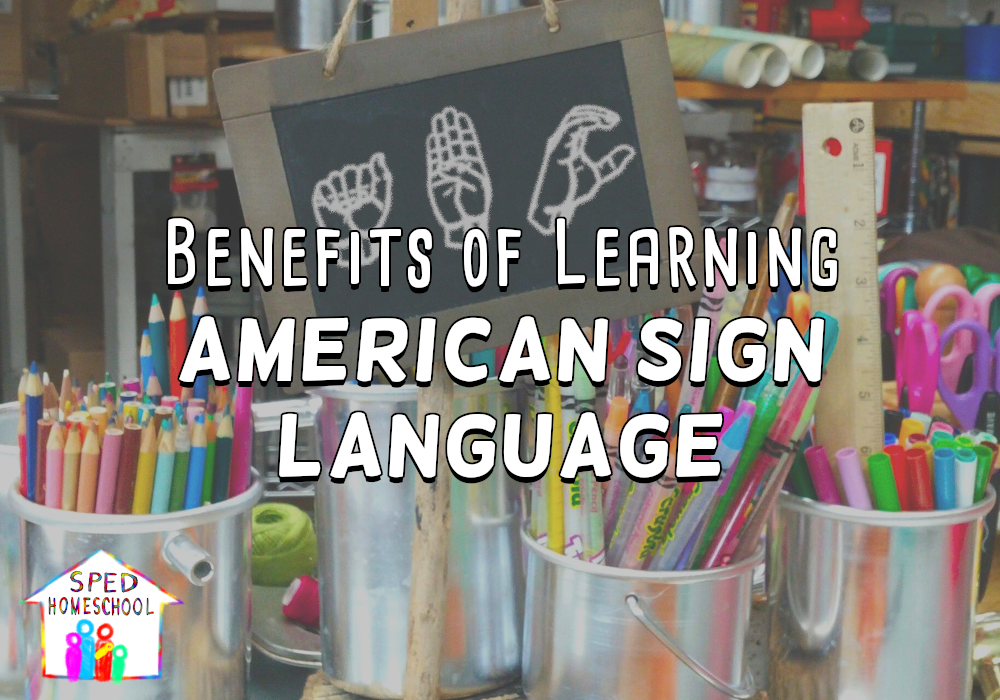
American Sign Language is a beautiful and useful language to know. I have used it many times in my adult life to communicate with parents, customers, and friends. There are many benefits to learning a second language, and ASL is quickly gaining in popularity because it is visual and hands-on! It is currently the fourth most popular foreign language taken in college! Basic knowledge of a signed language can be an important tool for firefighters, police officers, and other professional civil servants, as well as scuba divers, stock traders, and more. 

Check out some more of the benefits:

  • Reduces frustration – helps with communication when words are difficult
  • Increases self-esteem – students feel successful and helpful
  • Enhances language and listening skills – students learn to watch and listen in order to respond
  • Enriches relationships – can be fun and exciting to communicate in sign language
  • Increases IQ – second language learning activates parts of the brain that are only activated by using a second language
  • Facilitates bilingual learners – the sign for “bird” or “turtle” is the same no matter what language you speak!
  • Improves spelling – finger-spelling provides a hands-on, visual way to learn and work on spelling words
  • Improves motor skills – signs cross the mid-line, work on fine motor tasks through finger-spelling, and help develop and activate multiple parts of the brain
  • Builds overall communication skills – ASL is an expressive language that requires paying attention to not just what is said but the facial expressions that go with it
  • Builds better vocabulary – since we tend to use our bodies to talk and communicate anyways, sign language builds on that natural tendency and helps to reinforce vocabulary


Do you homeschool a child who is nonverbal? Make sure to check out our Pinterest board filled with ideas on how to teach a nonverbal student or for more information about ASL check out these links:
5 Ways Sign Language Benefits the Hearing
Top Benefits for Learning Sign Language
7 Benefits of Sign Language


Did you benefit from this article?

Would you consider a small donation to support the ongoing work of SPED Homeschool?

Click Here to Donate Today


By Dawn Spence

We have been blessed to have a wonderful Occupational Therapist that comes to our home to work with our daughter. Occupational Therapy (OT) can be a valuable tool for children who have special needs. They help with sensory integration, fine motor skills, everyday living skills, and much more.

What if your child needs OT but insurance does not cover it or does not cover as many visits as your child needs? 

Here are some tips and links to products that you can use at home to help your child.

1. Special Pencils and Adaptive Tools
My daughter used golf pencils and Y pencils when she was learning to write. Golf pencils are small and force your child to hold the pencil with their thumb and index finger. Broken crayons can also serve this purpose.

Handwriting Without Tears  sells  these small pencils, but you can buy any type of golf pencil. The next pencil that helps children who have a tight grip or need extra help to put their fingers in the correct position is the “Y” pencil. You can find them on Amazon.

Another adaptive tool that helps children who need to have input when they are writing are weights for the pencil. Each weight is a little different, and you will have to figure out which one is the best fit for your child. Here are some examples.

2. Slant Boards
Some Children need a slant board to visually track while they read and write. They can be expensive, so I took a 3-inch binder and attached a clipboard with velcro. The slant board can also stabilize their paper so that they can focus on writing correctly. 


3. Cutting Skills With a Smile
Cutting is not always easy for children with special needs. Sometimes figuring out where to place their fingers can be difficult. Drawing a smiley face on their thumb is a great visual reminder for their finger placement because the face needs to be facing up. KUMON books have great cutting skills books.

4. Using Tweezers to Improve Fine Motor Skills and Pincer Grip
Tweezers can be a cheap, easy tool that can help your child. You can use tweezers to pick up buttons or beads, and while your child thinks they are playing, they are also working their muscles and grip. Lakeshore has some games that you can buy called  Feed The Animals Fine Motor Games.

5. Using Special Paper
Writing can have challenges, but finding the right paper can help your child. Using raised lined paper can help the child who needs a tactile writing experience. If your child also needs a visual cue, there is paper that has raised colored lines.

These are some of the tools that you can use at home to help your child be successful in everyday learning activities.

More Ideas
To find more ways to provide DIY therapy for your homeschooled student, make sure to check out the SPED Homeschool Therapy Resources page as well as the SPED Homeschool Occupational Therapy Pinterest board and the SPED Homeschool Therapy Pinterest board .


Did you benefit from this article?

Would you consider a small donation to support the ongoing work of SPED Homeschool?

Click Here to Donate Today


By Peggy Ployhar

In the previous article in this series on parenting anger, I mentioned this next step is the glue which helps hold the integrity and authority changes in your parenting in place. Here is why this step plays such an essential role in repairing any disconnect with your child when your parenting anger has caused division in the past.

Judgment by Reaction
Looking at our children through a lens that is not personally judgmental can be very difficult. We tend to have strong feelings for how much we desire to see our children succeed. These strong feelings can easily be read by a child through nonverbal communication. When our body language shows we are nervous, stressed, or even bothered when a child fails, our reaction passes along judgmental overtones. These reactions, if repeatedly observed by a child, will convey a parent’s inability to accept failure even without any verbal communication.

Most of the time when we struggle with accepting our child’s weaknesses, it stems from our own inability to accept our failures. If you struggle in this area, and in accepting yourself for being less than perfect, then the first thing you need to realize is that failure is an essential part of life which helps us, and our children grow and learn.

Embracing Failure
A while back I wrote an article called Failing to Learn where I stressed the importance of learning how to accept failure as part of the learning process so mistakes can be launching points for more learning instead of roadblocks of further exploration and understanding. With each mistake, we are given the opportunity to see how and why we failed. From there, we must choose to take what we learned in failing, and joyfully move forward in the hope that our next attempt will be better than our last based on what we learned in the last go-around.

When we can change our perspective about failure, the mechanics of accepting our children also becomes much easier. We are more prone to say “oops” when mistakes happen. And, our child’s limitations are given flight to become vehicles for greater discoveries.

When we start to make this shift towards accepting a child’s limitations and working on our responses to their failures, we also need to change our approach in how we redirect our child’s reaction to their failures. This is where the big change in your parenting needs to happen to glue all these elements together…and to prepare for the final steps in cultivating your child’s heart.

The Boxing Ring
When a child sees your reactions to their failures as an attack, you, in turn, will become the object for any out-lash in dealing with internal feelings of inadequacy. You essentially become your child’s punching bag because your reaction comes with a dual meaning. First, it conveys to your child you are safe because your love for them is what caused your reaction to their failure, but secondly, you are also an enemy because your reaction has placed you in their battle zone. Thus, instead of your child taking on the real issues he/she is facing, exposed through failure, your child makes the issue about your relationship.

If you were to view this scenario as a boxing ring, your child would be in the battle of life with you in the same ring. There are many things your child battles each day, but your job as a parent was never to be his opponent. Instead, you have been called to be a coach who can provide fighting strategies for all the important things he fights through in life.

Coaching to Success
By accepting your child’s fight as part of the learning process, and your role as the ever-vigilant coach through this training period in your child’s life, your goal will be to remove yourself from the ring by accepting your child and battles they are up against. Win or lose, you must show you are willing to stick it out while learning alongside as to what works and what doesn’t with failure, and success, leading to the winning strategies.

Each time your child tries to get you into the ring, you must make a dedicated effort to keep your feet out of the battle zone. And when needed, calling a “time-out” a break until your child is ready to receive training instead of taking you on in the ring. Over time this process will become easier, especially as your child starts to see the value of having you working with them to fight these struggles instead of being frustrated, embarrassed, or upset when they fail.

Continue to be Encouraged
In my next article, we are going to continue with the next step in the process of cultivating your child’s heart, which is forgiveness. Until then, make sure to keep fighting the good fight alongside your child and make sure you are getting the encouragement you need to keep pressing on. 

One way you can get exclusive resources and a monthly dose of encouragement in your inbox is by subscribing to the SPED Homeschool newsletter. Also, make sure to check out our podcast channel  or download one of the SPED Homeschool Conversations podcasts on iTunes or Google Play for lots of great content to encourage you in your family life, homeschooling, and special needs parenting.


By Amy Vickrey, MSE

The first post in this series on writing an IEP covered the things you should do before you start. Once you have followed the four steps she outlines, you are ready to consider what goals and objectives you want to focus on for your child. For some children, these goals will be the main focus of an entire subject or area of weakness with other topics in that area playing a more minor role. For others, these goals will be the whole focus for that entire year. 

Let’s start by looking deeper into what the difference is between a goal and an objective.

Goals
A goal is the intended outcome of what you want to achieve for each area of weakness. Ideally, you want 3-5 goals focusing on the most important areas or the areas of greatest need. The best goals follow the SMART goal formula:


SMART IEP goals are
:
Specific
Measurable
Use Action words
Realistic
Time-limited

 
Objectives
Objectives are the steps you take to reach your goal. They take the big goal and break it down by time or by skill.

Let’s look at an example:

Handwriting goal: John will write his name, with correctly formed letters, in the correct order, 3 times over a week.

Objective 1: John will use playdoh, art materials, and manipulatives to create the individual letters to spell his name, using a visual prompt, 3 times over a week.

Objective 2: John will write the individual letters, J, O, H, and N using correct form, 3 times over the week.

Objective 3: John will use playdoh, art materials, and manipulatives to create the letters to spell his name correctly, using a visual prompt, 3 times over a week.

You can see how these objectives build on each other, so that by the time John completes the last objective, he is ready for the final goal of writing his name correctly.


Objectives or Not?
Whether to include objectives is really dependent on personal preference and the individual goal. It can help provide focus and direction on the steps and skills leading up to a goal. Goals can be used for any academic or life skill area (like learning a math or toilet training). 

Now that you know how to write goals, you should be able to have a more focused and purposeful school day. The next article in this series will focus on helping you track progress so you know when to change the goal or make a new one. 


More Resources
Check out our  IEP Pinterest board or these links for more ideas:

Setting Annual IEP Goals:  What You Need to Know 
IEP Goal and Objective Bank
IEP Goals and Objectives – 1000s to Choose From
Creating SMART IEP Goals and Objectives


Did you know SPED Homeschool is 100% donor funded?

Donate today


By Mary Winfield

Now that your learner has worked through fine motor skill problems and can write letters, it is time to put it all together!

Usually when a child starts to learn to write, the letters are big and sloppy. That is totally normal! Once your child becomes more familiar with writing and has more control, then it is time to work on sizing, alignment, and spacing.

Sizing:
Sizing refers to how big the letters are by themselves and in relation to the page. A lot of kids start by making their letters as big as they possibly can on a given sheet of paper. Teaching them to write smaller yet big enough to be legible can sometimes be a challenge. But there are creative ways to encourage proper sizing.

First, take a partial sheet of paper and cut out a box that is roughly the size you want their letters to be. Then, place that on top of the paper they are writing on. The guide will help them to properly size their letters until they can do it on their own. You can also draw boxes directly on the paper for them to write inside. Special handwriting paper with raised lines can give them tactile input for the limits they should stay within, or you can also create these lines with puffy paint or wikki stix.

Alignment:
Alignment refers to how the letters are positioned on the paper in relation to the letters around them. Basically, is your child writing on a straight line, or is that sentence wiggling all over the paper?

Different letters have different positions. For instance, the letter “t” is a tall letter, letter “a” is a middle letter, and letter “p” is a bottom letter. This can be a difficult concept to grasp. To help your child understand, you can play a game. Hold up a letter on a flashcard (or just say it if they don’t need the visual prompt) and have them either raise their hands above their heads, cross their arms, or bend down to touch their toes depending on the alignment of the letter.

To help them when they are writing, kids need to be aware of where the baseline is for the words. We write on lined paper, which helps us keep our words straight, but your learner may need more help. You can emphasize that baseline with a highlighter or colored marker to help it stand out. You can also provide a tactile cue by raising the baseline with puffy paint or a wikki stix so they are aware when they are dipping below it or not. Though this can make writing “bottom” letters more difficult, it can help at the beginning when establishing what a baseline is.

Spacing:
Finally, spacing refers to how far apart the letters are in a word, and how far apart the words are in a sentence.

One helpful metaphor that I was taught, was “Spaghetti and Meatballs.” Letters should have a small space between them (like an uncooked spaghetti noodle), and words should have a bigger space between them (like a meatball). You can actually draw these lines and circles to reinforce the concept, but kids generally catch on pretty quickly.

There are many other visual cues you can use to help them with their spacing. Using things like a popsicle stick, stickers, manipulatives, or even their own fingers, can help them keep their spacing consistent. Decorating their popsicle sticks in a way that is appealing to them can also help keep kids engaged in the task.

To add an auditory cue, read their writing out loud to them to help them recognize the purpose of spacing. If words are squished together, then read them really fast and jumbled up. By pausing at the spaces and jumbling the words when spaces are missing, you can help your child to hear the importance of spacing in their writing.

For more ideas, here are some Pinterest boards to help you!
SPED Homeschool Handwriting Board
Growing as They Grow Pinterest Board

If you need to catch up, here are links to the previous posts in this series on teaching your child to write:
Pre-Writing Pointers
3 Stages of Forming Letters


Did you benefit from this article?

Would you consider a small donation to support the ongoing work of SPED Homeschool?

Click Here to Donate Today


By Jennifer Duncan

Raising and teaching gifted children is an amazingly fun challenge, but it is a challenge. Something that I have learned over the past few decades is that often, the best way to teach a gifted child is to allow them to teach you.

That may sound counterintuitive – aren’t we supposed to be the teachers? Yes, but allowing your child to teach you, and allowing yourself to learn from them, can actually have a lot of benefits.

There are several ways in which your child can teach you. Here are the two that I have found work well!


Teaching as a Learning Tool
One of the hardest things about teaching a gifted child is that they tend to learn extremely quickly, and they like to dig deep. This can get exhausting, but it can also stump the most dedicated teacher. How do you teach a ten-year-old who has already surpassed you in some subjects?

This question comes from personal experience.

My son surpassed me in math and science when he was ten, and in other subjects a few years after that. At that point, I had two choices. I could either give up on teaching him and turn him over to someone else, or I could get creative and create an environment in which he could learn.

I chose the latter.

Because I could no longer be the instructor for those subjects, I decided to be transparent with my son. I told him that if he would be open and honest with me about what and how he wanted to learn, I would keep him supplied with resources. Instead of being his instructor, I would be his fellow student – I would learn along with him.

Instead of evaluating him through tests, I studied along with him and allowed him to teach me what he learned. If he could explain it in ways that made perfect sense to me, I knew that he had a good understanding of the material.

Ten years later, we still work with this system, which brings me to the next benefit.


Teaching Your Gifted Child to Understand Others
Most gifted children are aware that they think, perceive, and learn in ways that are completely different from what is considered “standard” or “normal.” They may not be aware of what the “standard” or “normal” ways of learning actually are, but they know that they think differently.

As they get older though, this can present quite a challenge. If they think, process, and communicate in completely different ways from those around them, how will other people be able to understand them?

This is a real issue that many gifted children face. Often, the best way to help them overcome it is to be an open and honest (but compassionate) sounding board.

My son, who is profoundly gifted and twice exceptional, realized around age 8 or 9 that many people did not understand him. Kids his age did not understand why he wasn’t interested in the games or shows that they were. Instructors and leaders had a hard time with the fact that he often knew more about their subject matter than they did.

Many gifted children respond to this by simply hiding behind a “standard” mask, refusing to let people hear their ideas or see their creativity. Sadly, this is difficult to fully prevent, but it can be mitigated.

When your child knows that you really see them, even when they are awkward or speak like someone far older than they are, they will be more willing to open up. It may take quite a bit of practice before they are willing to do so to the world at large, but allowing them to be real, open, and excited with you can solve a number of problems.

First, it allows them to honestly gauge how effectively they are communicating with others (i.e., with you). Often, when my son is working on a paper, a devotion, or something else he wants to teach, he will talk it through with me. He knows that if I’m lost, there is no chance that other people will understand. If I track with him all the way, however, he knows that it’s good to go.

Second, being an honest sounding board for your child allows them to try new things and present new ideas in a safe way. Because they don’t have to worry that you will reject them if you don’t understand their idea, they have the freedom to dig in and work through it. Once they do, they will often have the confidence to then offer that idea to others.


Allowing Your Child to Teach and Grow
When your child thinks and learns in nonstandard ways, it can be difficult to find opportunities for them to learn and grow. Allowing them to teach you and allowing yourself to learn from them can bring many of these opportunities to light!

As they grow, they will find many ways in which to share their gifts, their creativity, and their abilities with others. Simply giving them the tools, confidence, and support they need can make all the difference!


Did you enjoy this article?

Consider supporting the ongoing work of SPED Homeschool

Donate Today