by the SPED Homeschool Team


Have you ever considered creating your own unit study to teach all your children at the same time? Below is a list of subjects you can teach multiple ages/learning levels with resources you can easily find at your local library and/or on the internet.


Once you pick your topic, use this article from our website on How to Create a Hands-On Unit Study to pull everything together for your unit.


Science

Magic school bus science

Nature 

Circuits

Weather 

Animals 

Geology

Biology- marine or regular

Systems of the body

Bugs

Gardening

Chemistry of baking

Fermentation

Habitats 

Ecosystems


History/Social Studies 

Geography 

Early America 

Famous people in history 

Native Americans 

States and local governments

Landmarks 

Seven wonders of the world

Famous scientists

Foreign studies (history, culture, food, traditions, holidays)

U.S. presidents

National parks

Film study

Christmas around the world


Art 

Step-by-step drawing 

Color wheels

Famous artists 

Mixed media art 

Sculptures of clay 

Water color

Digital art

Chalk art

Tie dying

Woodworking

Interior design

Cake decorating

Jewelry making

Metal design

Needlework

Bible journaling 


Music

Composer study

Genre study

Cultural music study

Physics of instruments

Scales

Vocalization/singing

Making instruments


Math

Fractions 

Cooking with measurements 

Measuring water

Dice games

Yard games, darts, archery, nerf targets (cumulative points)

Skip counting hopscotch

Minecraft 

Helping with family budget/grocery shopping


Language arts 

Readalouds

Book studies for particular topics

Mad Libs 

Analogies 

Vocabulary in cartoons, comic books, public signs, etc.

Foreign language 

Sign language


Health

First aid

Nutrition

Fitness

CPR 


Home Economics

Garment care

Auto repair

Home maintenance

Landscaping

Kitchen basics

Prepping meals 


Do you have any additional subjects to add to this list? Contact us with your suggestions and we will add them to the list.


Did you know that if every person who visited our website donated one dollar we would be completely funded?

Help us reach our funding goal  – Donate Today


By Jan Bedell, Ph.D., Master NeuroDevelopmentalist & SPED Homeschool Board Member

Teaching methods have come and gone, been expanded, and even more defined through specific curriculum. Some are geared toward specific learning styles and, since humans are all unique, it is good to have various means to get information into young brains. What if I told you about three small ways to make a big difference in your child’s education?


Why consider a Brain-Based Approach to learning?

Well, for starters, the realization that the brain controls everything you do would point to the importance of such an approach. If the brain is well-organized and information flows freely to all parts of the body without any sensory interference, the chances of concentrated learning go up significantly. If the individual’s short-term auditory and visual memory is humming along on all cylinders, that makes learning easier as well. If information goes into long-term memory in a way that can be easily retrieved with none of the “but you knew this yesterday” drama, the learning cycle is complete. The question is, how do we get from where we are with learning inefficiencies that make most traditional methodologies challenging for both student and teacher to that complete learning cycle outlined above? The answer lies in The NeuroDevelopmental (ND) Approach.  

In a nutshell, The ND Approach focuses on using the brain’s extraordinary ability to change and grow – plasticity (find out more about Brain Plasticity at this link). By giving the brain specific stimulation or input, it responds by building brain pathways to create better overall function. The central theme of this methodology is to use the Three Keys to Input to attain better coordination, improve sensory feedback to the brain, increase short-term memory, and ensure information is stored efficiently for future use.


These Three Keys are Frequency (F), Intensity (I), and Duration (D) – FID

Frequency is the number of times the individual is exposed to the same stimulation/information. Intensity is how strong the stimulation is given. Duration is short periods of time one or more times a day and then over a period of days, weeks, or months. 

What would the Three Keys look like practically in a subject area? Let’s take math computation, for instance. This is an area where we are often in a hurry for the student to be independent. Teaching is really inputting information to the students until mastery is achieved. Typically, we use techniques that are “output-based” like worksheets, speed drills, and flashcards with no answer on them. Where do we think the child will get the answer when we hold up a card with 4+5 on it? We don’t even think much about it. It is just what we do. This output method often reinforces the wrong answers and makes it even harder to master the new concept. An example of FID in math computation is when a new concept is presented, you do 3-5 problems (F) demonstrating how to do the problem. This takes very little time (D) since you are proficient in that skill. The interaction is positive, short, and pressure-free for the student (I). After the initial day or two of input in this way, it is recommended that you do 50% of the math lesson (every other problem) to keep this FID technique going. 

Brain Sprints created the  Rapid Recall System. This is the best Brain-Based Teaching technique where the student sees, hears, says, and writes five math facts 14 times a day (F) and it only takes 6 minutes (D). There are special sound effects to add intensity (I) to the listening sessions. Children that have had trouble remembering their math facts in the past now have them mastered. 

Do you think you don’t have time to sit with your child every day for math? Let me ask you how much time do you spend checking the paper, marking, re-explaining, and dealing with frustration? Trust me, you have time if you rearrange your approach.


Three Keys to Input for Reading

Another example of FID for reading proficiency is input instead of output with phonograms. Use the phonogram cards as input cards instead of asking the student what the sound is. Pick 5 cards; hold one up at a time and say the sound; mix the order of the cards and repeat this input for 1 minute. Repeat this process twice a day for about a week. Voila! Sounds are known. If this is not the case, you have to look deeper into the brain function.  The questions would be: 

    • Is there a vision challenge?
    • Is information being stored in the wrong place and can’t be retrieved easily?
    • Does short-term memory need to be improved?
    • Is the brain disorganized?

Once the child knows all the sounds, if there are issues with using phonics, like holding all the phonograms together to be able to decode a word easily, you will want to check on the auditory processing (short-term memory). Good auditory processing is the essential prerequisite to being able to read with a phonics approach. This topic is too lengthy to enter into here, but you can learn more about this important skill with this short video: Auditory Processing  

An individual’s sensory system is an important part of being able to pay attention and not be distracted or in some cases completely overloaded with hypersensitivities. If your child is not receiving sensory information well, you can get facts about the impact and some solutions from these videos from Brain Coach Tips on YouTube.  It Is Not That Loud! (Hyper auditory); It’s Just a Sock  (tactile oversensitivity)

The Brain-Based Teaching known as Brain Sprints NeuroDevelopmental Approach has proven effective with children with all types of labels – Dyslexia, Dysgraphia, Dyscalculia, ADHD, Autism, Fetal Alcohol Syndrome, Down, Sensory Integration Disorder. You understand more when you realize that the brain controls everything you do and when there are glitches, it just makes sense to get to the root of the issue in the brain. If you would like some guidance about where to start using a Brain-Based Approach, schedule your Free Consultation or visit  www.BrainSprints.com for more information.


Did you enjoy this article?

Consider supporting the ongoing work of SPED Homeschool

Donate Today


Lara Lee

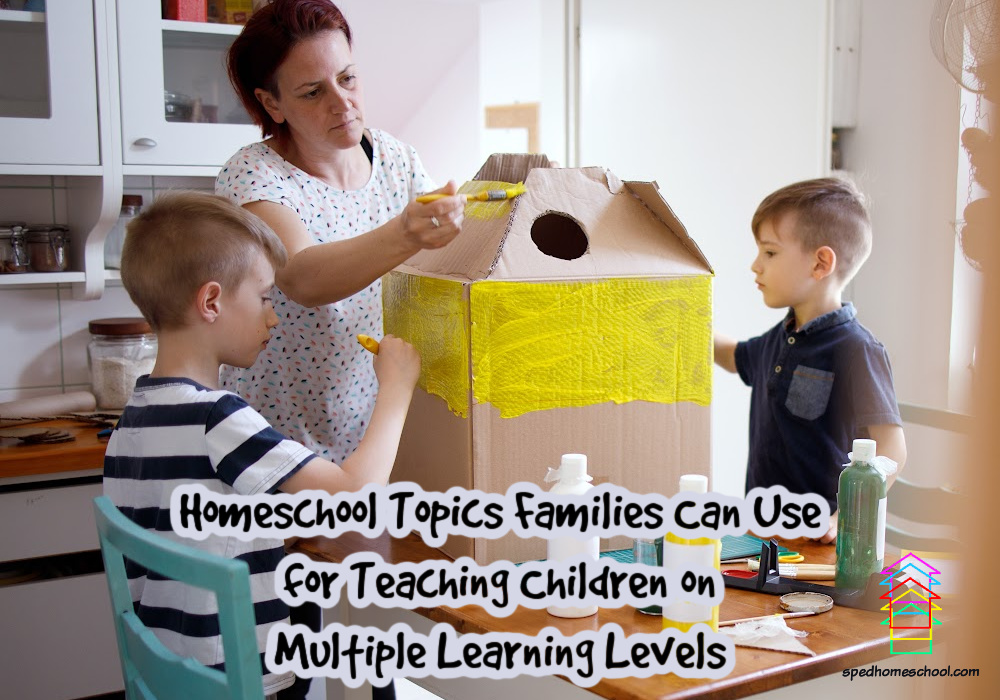
When my son was diagnosed with autism at five years old, I knew he couldn’t attend school. Even though we had always been around other children at church, play dates, library reading time, and mommy-and-me music times, my son developed a phobia of other children. He would have a meltdown or curl-up on the ground from fear when a child walked into the room. I had to homeschool him. My question in starting was, “HOW do I teach this child?”

You notice I didn’t say, “WHAT do I teach this child?”

The “what” to teach is built into every curriculum out there, but when I taught my son these “self-teaching” lessons, he would sit and fidget, not doing anything I asked.

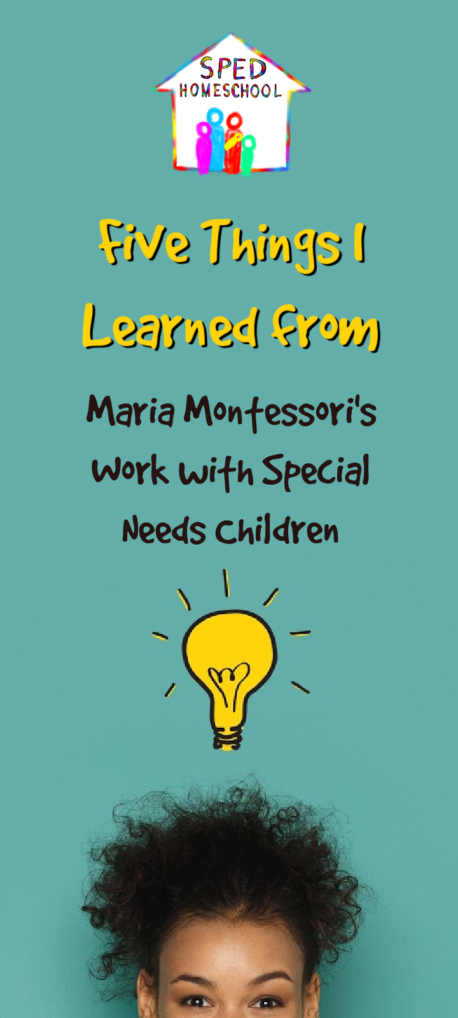
Maria Montessori’s book, Absorbent Minds, opened the door for me. This book is not the Montessori Method most Americans associate with gifted programs today. In the early 1900s, Montessori had started her career teaching children with disabilities who had been institutionalized. Her students went on to test academically higher than the typically developing children of her day. Here are five things I learned from her time at the institution working with disabled children:


1) Don’t do anything a child can do for themselves – the hand-over-hand method

This may seem contradictory to you. The hand-over-hand method is when you gently take a child’s hands and guide them through an activity. With my son, I put a pencil in his hand and slowly traced letters. How is this having a child do something themselves?

You do not force a child to do this against their will. The task is completed together for children who will not reach out and try to do something independently. The hand-over-hand method creates muscle memory and neuro-pathways. Parents sometimes use this method intuitively when teaching young children how to wash their hands or brush their teeth. You can use this method to teach writing, typing, cutting, and many other skills. As a child learns the skill, you move your hand up their arm to guide their wrist rather than hand-over-hand. You may then have the child try to do the task one time alone before doing the others hand-over-hand.

The connection between hand-over-hand and independence made sense to me when I observed a classroom where the teachers were busily cutting and pasting an activity for teenage special needs students. The teens just sat and watched them. These students were not learning how to cut and paste. They were learning helplessness. It would have been better for the teachers to take their hands and help them do the activity themselves. 

Using this method, my son learned how to write both print and cursive on his own. He has also become a fan of drawing Sonic characters from online tutorials.


2) Don’t talk so much!

Montessori observed a student-teacher instruct a class on what a square was.The student-teacher held up a red square and said, “Look class! This is a square. It has four straight sides. One, two, three, four. Four corners: one, two, three, four. It is not a circle…” and on she talked. The children began to fidget and wander off from the lesson.

Then Montessori took the red square and a red circle. She asked the most fidgety child which one was the square. The child couldn’t say.

Montessori handed the red square to him. “This is a square. Say square.”

The child held the square and played with it. He said, “Square.”

Then Montessori took the square back and handed the child the circle. “This is a circle. Say circle.”

The child played with the circle and said, “Circle.”

Finally, Montessori asked the child which one was the square. The child knew the correct answer.

For the special needs child, much of our curriculum is fluff. Cut the fluff and focus on the one thing you are trying to teach. If a child learns one thing during each lesson, you have accomplished something. That is often enough. Take education one step and one goal at a time.


3) Children learn through their senses

Montessori observed that children learn by touching, tasting, looking, and hearing things. We all learn this way. Many of us have know about visual learners, auditory learners, and kinesthetic learners who learn mostly through one of the senses. Researchers have discovered that even if that is true, the more senses we use, the better we learn something. The majority of Montessori’s methods revolved around “toys” that were child-sized. She was not a fan of worksheets. She believed that children learned best during play. This is their work.

This was a difficult concept for me to use. My son hated crafts and coloring. He was also so distracted by manipulatives in Math to the point he couldn’t learn while they were out. Through trial and error, I discovered that songs with movements worked well. Doing real chores (hand-over-hand at first) was great for him. We did science experiments, YouTube videos, games on the tablet, typing, play-doh, field-trips, flashcards, and felt-boards. We did cut and paste matching activities, timeline pages in a notebook. I researched ideas on TeachersPayTeachers.com for any way to teach the topics in our curriculum that required less talking and more sensory input. It took a lot of prep work, but it made learning possible for him.


4) Observe your child and record data

Montessori was a physician first and an educator second. She approached teaching like a scientist. She observed what a child was doing and recorded their developmental progress. Parents of children with autism may be familiar with ABA therapy’s method of trials and data collection. Speech therapists and Occupational therapists do this too. I highly suggest trying to do this yourself.

I did this by downloading a developmental list from some websites and checking off what my son had learned as he grew. I wasn’t grading him or comparing him to other children. I used this to know what we needed to work on next. One list I found focused on social skills. Another list was the Texas Teks that is used by public schools to design curriculum. Another list I found was for speech development. All of these were free. I would look at these lists every month to check off what he could do and date it. Then I would find a few things he couldn’t do to make our next goals and work on those.


5) Relationships are primary!

Out of all I learned from Maria Montessori, the most important was her teaching relationship. She cared about the children she taught. She played with them and showed them new ideas with motivation and exuberance. When you are interested in what you are teaching, your child will soon become interested too. Don’t teach something that bores you to tears. Find the format of that information that you and your child can enjoy together.


I hope the lessons I learned help you as much as they helped me!


Did you enjoy this article?

Support the ongoing work of

SPED Homeschool

Donate Today


By Peggy Ployhar

A few weeks ago as I was interviewing Andrew Pudewa on our weekly live broadcast, SPED Homeschool Conversations, I made a comment about the process I used to successfully teach my own son how to write using IEW’s (The Institute for Excellence in Writing) program. Slow and steady was my response. You can watch the the long interview or shorter videos taken from that interview on  our YouTube channel, or listen to the podcast at this link.


In this article, I wanted to expand upon my answer and explain not only how to homeschool slow and steady and how it led to educational successes for my own children, as well a how it can lead to success in your own homeschool.


Pressure to Succeed
Too often I speak to parents who are extremely anxious about getting their child caught up with a typical learning or developmental timeline. There is so much pressure in the educational community, including homeschooling circles, to press children towards measurable success. Unfortunately, this pressure can have parents focused on college readiness while their kindergartner is still learning numbers and letters.


Having now homeschooled for over 16 years and graduated 2 struggling learners I find myself looking back and realizing how much of this pressure I allowed to side-track our homeschooling. If I were to be honest, my “progress panic attacks” caused as many problems as my children’s learning issues and defiant outbursts.


Progress Instead of Pressure
In hindsight, I realized when I let external pressure take control of my teaching, I was least effective in homeschooling. On the other hand, when I kept my nose down and stopped looking at what we weren’t doing and how far we were away from where I wanted my children to be, progress was evident.


Now, I have to admit I didn’t always see a measurable product of my efforts when homeschooling slow and steady. We just kept moving forward at a steady pace gauged to match the speed each child was learning. Many days it seemed like we were just going through the motions, repeating things WAY too much, and moving so slowly that no progress was happening. But, that is the essence of teaching slow and steady; it grasps being in the moment and teaching what needs teaching now, not tomorrow.


5 Tips for Keeping Your Homeschooling Slow and Steady
If you struggle with homeschooling at a slow and steady pace, here are my 5 tips to keep you teaching in the moment towards homeschooling success:


1 – Create a General Plan
Make a learning plan not constrained by dates. Instead, focus on learning goals and steps that progress towards those goals. Many parents find it helpful to write a homeschool IEP for their student with regular assessment intervals – monthly or quarterly is best for measuring notable progress. We have everything you need for free on our site to write you own IEP, just go to this link.

If you are interested in writing your own IEP, check out these other great articles on our website:
4 Things to Prepare Before Writing Your Child’s IEP
How to Write IEP Goals and Objectives
Writing an IEP: Accommodations and Modifications
How to Track IEP Goals


2 – Teach According to Your Plan
This may sound simple, but sticking to the plan is one of the most difficult steps if you are like me and panic gets you off track. One day at a time, nose down, and determined to not get off track is the way to stay consistent.


3 – Don’t Accelerate Faster Than Your Student
Moving too fast actually makes learning take longer. Progress takes time and moving at the pace of your student will ensure your child is absorbing the lessons you are taking the time to teach and integrating those lessons into their long-term memory for better recall when those facts need to be used for more complex processes.


4 – Take Frustration Breaks
If frustration sets in, take a step back to re-evaluate. Don’t blame yourself or your child, these breaks are natural. Sometimes you will need to switch tracks on how you are teaching a subject if your student has a learning block. Other times you both need some time away from that subject altogether. If neither of those methods works, then it may indicate you need to seek out help from a professional. But stepping back is essential in determining which course of action is the best for your situation.


5 – Remember to Not Compare
No matter what learning pattern is set by other children in your household, your friends’ children, or any “normal” developmental timeline, your child is unique; and therefore, your child’s progress will be unique. This is true whether or not a child has been diagnosed with a learning disability. All children learn in spurts and stall out at times, this is natural. By not comparing one child to another, you allow your child to learn and grow at the pace that best suits your child’s level of learning progression.


Evidence Worth the Wait
In that same conversation I was having with Andrew Pudewa, I confessed we used his curriculum with my oldest son, but this same son never wrote a paper for me in the entirety of his homeschooling career. Each day we did the writing lesson, went through the steps, learned the process, and slowly and steadily I taught him the mechanics of good writing. After graduating high school this same son would text and email me while he was away studying at welding school, but he still never wrote a paper. Then, when he started college just after turning 18 he started writing beautiful papers and getting A’s in his college English classes. That was when it became evident to me that he had learned the process of writing because I had taught him slowly and steadily using a system that worked. It just took him time to use what he had learned and produce a product that showed the process had worked.


I pray as you look to the new year and set goals for your teaching and homeschooling, as well as for the individual progress for each of your children, that you will conquer any anxiety or fear you may have about the future by following the steps I have outlined above.


Did you benefit from this article?

Would you consider a small donation to support the ongoing work of SPED Homeschool?

Click Here to Donate Today


By Jennifer Duncan

Raising and teaching gifted children is an amazingly fun challenge, but it is a challenge. Something that I have learned over the past few decades is that often, the best way to teach a gifted child is to allow them to teach you.

That may sound counterintuitive – aren’t we supposed to be the teachers? Yes, but allowing your child to teach you, and allowing yourself to learn from them, can actually have a lot of benefits.

There are several ways in which your child can teach you. Here are the two that I have found work well!


Teaching as a Learning Tool
One of the hardest things about teaching a gifted child is that they tend to learn extremely quickly, and they like to dig deep. This can get exhausting, but it can also stump the most dedicated teacher. How do you teach a ten-year-old who has already surpassed you in some subjects?

This question comes from personal experience.

My son surpassed me in math and science when he was ten, and in other subjects a few years after that. At that point, I had two choices. I could either give up on teaching him and turn him over to someone else, or I could get creative and create an environment in which he could learn.

I chose the latter.

Because I could no longer be the instructor for those subjects, I decided to be transparent with my son. I told him that if he would be open and honest with me about what and how he wanted to learn, I would keep him supplied with resources. Instead of being his instructor, I would be his fellow student – I would learn along with him.

Instead of evaluating him through tests, I studied along with him and allowed him to teach me what he learned. If he could explain it in ways that made perfect sense to me, I knew that he had a good understanding of the material.

Ten years later, we still work with this system, which brings me to the next benefit.


Teaching Your Gifted Child to Understand Others
Most gifted children are aware that they think, perceive, and learn in ways that are completely different from what is considered “standard” or “normal.” They may not be aware of what the “standard” or “normal” ways of learning actually are, but they know that they think differently.

As they get older though, this can present quite a challenge. If they think, process, and communicate in completely different ways from those around them, how will other people be able to understand them?

This is a real issue that many gifted children face. Often, the best way to help them overcome it is to be an open and honest (but compassionate) sounding board.

My son, who is profoundly gifted and twice exceptional, realized around age 8 or 9 that many people did not understand him. Kids his age did not understand why he wasn’t interested in the games or shows that they were. Instructors and leaders had a hard time with the fact that he often knew more about their subject matter than they did.

Many gifted children respond to this by simply hiding behind a “standard” mask, refusing to let people hear their ideas or see their creativity. Sadly, this is difficult to fully prevent, but it can be mitigated.

When your child knows that you really see them, even when they are awkward or speak like someone far older than they are, they will be more willing to open up. It may take quite a bit of practice before they are willing to do so to the world at large, but allowing them to be real, open, and excited with you can solve a number of problems.

First, it allows them to honestly gauge how effectively they are communicating with others (i.e., with you). Often, when my son is working on a paper, a devotion, or something else he wants to teach, he will talk it through with me. He knows that if I’m lost, there is no chance that other people will understand. If I track with him all the way, however, he knows that it’s good to go.

Second, being an honest sounding board for your child allows them to try new things and present new ideas in a safe way. Because they don’t have to worry that you will reject them if you don’t understand their idea, they have the freedom to dig in and work through it. Once they do, they will often have the confidence to then offer that idea to others.


Allowing Your Child to Teach and Grow
When your child thinks and learns in nonstandard ways, it can be difficult to find opportunities for them to learn and grow. Allowing them to teach you and allowing yourself to learn from them can bring many of these opportunities to light!

As they grow, they will find many ways in which to share their gifts, their creativity, and their abilities with others. Simply giving them the tools, confidence, and support they need can make all the difference!


Did you enjoy this article?

Consider supporting the ongoing work of SPED Homeschool

Donate Today


By Jill Camacho

Have you tried absolutely everything to motivate your child to get their school work done? Are you using incentives and worried about bribing? Are you unsure if rewards are a great idea in the first place?

I get where you’re coming from. Read on and learn from my own experiences with using external motivators and be prepared for an unlikely surprise!
 

Aren’t bribes and rewards the same thing?
Nope.

You read that right. External motivators (aka incentives or rewards) are not bribes. I used to be under the same impression! Constantly, I found myself confused by conflicting advice. There are parenting books saying, “Don’t bribe,” but then reward charts are used in ABA therapy. What’s a parent actually to do!?

I finally learned the difference when I confessed to our ABA provider that I was bribing my son for good behavior that day.

Then she set me free…
 

There’s a small, but a key difference
I think the best way to explain it is through example, but basically, it matters when and how you’re employing the external motivator.

Let’s say your child loves playing Minecraft, but hates doing math. I’m going to use this hypothetical to demonstrate both a bribe and an incentive.

Bribe: Your child is crying, arguing about math, and basically falling apart. You say, “If you finish 4 more questions, you can play Minecraft!”

Incentive: You start an ongoing policy that no Minecraft will be played before math is complete, or perhaps that after every page of math completed, they can have a 15 minute Minecraft break.

See how the bribe happens after the undesirable behavior? Your child can employ the behavior to get the reward. In the case of the incentive, there is a hard and fast set of rules and expectations. They are established before any “negative” behaviors begin. The child lives up to their end of things before getting the reward.

So, in adult terms, it’s the same as working hard for a raise or promotion as opposed to getting a raise because you are threatening to move jobs. In that last case, you have the power and the boss is bribing you to stay.
 

Now that we’re clear on that…
I think it’s important to discuss the pros, cons, and other things to consider when using external motivators in your homeschool. Nothing in life is super easy, right? Here is what I have learned putting these ideas into practice…
 

Using food or electronics
Be careful about how you’re using food or electronics in terms of motivation. I’m not saying don’t ever do it, but be thoughtful in how you are doing it. Think about the long-term consequences and how to mitigate any problems it may cause.

Be aware that constantly using food or sugary treats to motivate can be a slippery slope into bad eating habits and eating issues down the road. Our brains already light up on MRIs with sugar consumption. Now imagine when it’s consistently given as a reward for doing something undesirable? That same principle applies to electronics.
 

Intrinsic motivation
Make sure you’re not building a reward monster who will only do things for clear, external rewards. Build in ways to practice being intrinsically motivated and flexible. While we generally all work for a paycheck (external motivator), we need to do other things like eating healthily or cleaning the house because we are intrinsically motivated.

Our goal isn’t leaning so heavily on rewards that they grow to expect them for any and every little thing. We try to reserve them for the “big things.” However, if you need to start with the small things too, just keep re-evaluating how and when to phase them out.
 

Stick to your guns
If you told your child the rules for the incentive… those are the rules. You can adjust them as needed, but do so carefully. If they are having a meltdown moment over the undesirable activity, don’t adjust it right then. Adjust your expectations the next day or after taking a break to soothe.

Don’t cave into giving them their Minecraft time (or whatever the reward) for less than the agreed amount of work because they are having a hard moment. That’s how you slip back into bribing. Just adjust the agreement in the right timing if truly necessary. The magic of incentives lies in the follow through!


Did you benefit from this article?

Would you consider a small donation to support the ongoing work of SPED Homeschool?

Click Here to Donate Today


By Amy Vickrey, MSE

As I finish my first year of homeschool with my 6-year-old, soon-to-be “First Grader,” I am looking over the last year at all we have accomplished, and I am amazed. Just an hour or two of work most days of the week has helped him learned to read, do simple addition and subtraction, and begin into the writing process when he wasn’t even writing his name when we started. I know that even more important than meeting these goals is keeping one big goal in mind: the goal to create in my son a LOVE of learning.

I want him to become a LIFELONG LEARNER!

What does this mean? I want him to love seeking out new information and new knowledge, to never stop growing and learning. To have the tools to seek out information he wants to know.


Choose to Be an Example to Follow
To create a life-long learner, I must first be a lifelong learner myself. Children learn through examples. Here are some resources about how and why to become a life-long learner, even as an adult:

Why You Should Strive to Be a Lifelong Learner
Continuing to educate yourself can help you be more successful on the job and in business.

Learning is Good for Your Health, Your Wallet, and Your Social Life
Learning keeps your mind and body healthier, helps you create better spending habits and earning potential, and helps you become a better socialized and able to socialize person.

How and Why to Become a Lifelong Learner
Lifelong learning develops leadership potential and helps unlock skills throughout life that are not developed in the younger years.

If you are reading this blog, you probably are or are wanting to be a lifelong learner already! As a lifelong learner myself, sometimes it is still difficult to get my child to see the bigger picture of continuing to learn and grow throughout life. So I work to equip my son with tools to help him reach this goal. These tools include:

1 – Encourage the Love of Reading
With the ability to read comes the ability to learn anything. In today’s society, I would add the ability to use a computer too. We are blessed with computers that can read to us and help us with the reading and learning process. A love of reading helps make this an enjoyable experience and a desire to reach out and learn more.

2 – Handle Mistakes as Opportunities to Learn
The simple truth is everyone makes mistakes. It’s how we react to those mistakes that define us. Learn from mistakes; learn together; show how you learn from your own mistakes and help your children learn from theirs. Natural consequences are so powerful, especially when children are young. It is so much more powerful to teach a child how they got an answer wrong than to just mark it wrong.

3 – Teach Skills on How to Find Answers
When my son asks me a question I don’t know the answer to (or sometimes I do), I show him how to look up the answer on the computer, in a book, through Google, and other resources. I let him see me asking questions about things I need to learn. How to find answers is a powerful tool. It goes along with reading and a love of reading. I may not know the answer, but I know how to find it, and how to know if my source is credible.

4 – Allow Choice in Learning
I think this is the essence of homeschooling. The ability to give children the ability to have a choice in what they are learning. At my son’s young age, this means I provide books, games, and other materials on topics he likes or might like, and I let him explore them in his free time. About the time he thinks he has exhausted the bookshelf, he finds something new to explore. We go to the library, and I let him talk to the librarian about subjects and topics he is interested in. We explore TV shows and documentaries together about topics he loves. I have learned more about dinosaurs in the last year than I thought possible. But it’s what he loves and he is learning too.

5 – Provide Time for Play
Play is such an important part of the learning process. It is when children take information and make it their own. It is when they learn to seek out answers and take chances. To read more about play check out my April blog, Learning Through Play.
 
6 – Teach Goal Setting
Setting educational goals together can be a powerful tool to get your child engaged in the learning process. Start with small goals and build to bigger goals. Maybe your goal is to write your child’s name or to identify the first letter of their name. Make the goal together, work on it together, and when you accomplish it, CELEBRATE! To learn more about goal setting and healthy habits, check out The Leader in Me, 7 Habits of Happy Kids!

7 – Make Time to Celebrate
Celebrate the successes, whether big or small! When my son first started out working on sight words, we celebrated with a trip to the ice cream shop anytime he accomplished his goal. Now he is reading almost anything he picks up! By celebrating, it helped to create excitement and enjoyment. This is an important part of the process.

I hope you enjoy the journey as much as I am!

For more information on lifelong learning, check out these links:
6 Lifelong Learning Skills
5 Steps to Developing a Lifelong Habit of Learning
10 Simple Ways to Engage in Lifelong Learning

We at SPED Homeschool also want to help you keep growing and learning. Make sure to visit our website for new articles; our YouTube channel for new videos; and our Facebook page and  support group for lots of interactive training and support so you can keep learning new ways to teach your struggling learner.


Did you know SPED Homeschool is 100% donor funded?

Please consider donating today


By Kimberly Vogel

Good teaching involves many different approaches to presenting information. One of my favorite good teaching practices involves questioning strategies. Often overlooked, asking the right questions encourages the student to use critical thinking and to discover information independently.

The value of a question
A question puts the student in an active position. It encourages them to internalize learning and formulate a response. However, not all questions provoke deep thought. Many require only simple recall, and while that’s a needed skill, it’s not moving into higher levels of thought. Bloom’s Taxonomy puts thought processes into different levels.

Bloom’s Taxonomy is a classification system for learning objectives. It was created to help teach students higher levels of thinking and learning. There are even charts with questions for each level. It’s a good place to start to develop deeper questions, but there is one question that I love asking!

One simple question:  How did you get that answer?
This question takes problem-solving a step further. It guides the student through explaining their thought process. This is very difficult for some students.

It takes time and encouragement for them to feel okay with sharing their thought processes and finding the right words to verbalize it. Many students say, “I don’t know” and they really don’t! It’s hard to follow thought processes and explain it. Keep trying. Stay patient. I often say “Think out loud” to encourage them to find the words. Model it for them so they can see how it sounds to think out loud.

I recently wrote about my top homeschool tip: teaching your children where they are. It follows the belief that student success is based on guiding a student through problem-solving according to their potential. The guide can be an adult or another peer who has already gained knowledge on the subject.

Guiding through problem-solving often means breaking down a lesson or problem into smaller pieces or modeling the process. When you look at a student according to their potential, you look not only where they currently are, uninhibited by grades or where others say they should be, but also where they need to be based on the time needed. Some students work faster while others have a slower pace.

Use problem solving and questioning strategies to advance learning
If a student keeps hitting a wall or stalls in learning, guiding them through learning takes the form of problem-solving and questioning strategies to help them advance. In order to do this, you need to put the next lesson aside and spend time discussing the current level to assess their understanding. Some great questions to achieve this are:

  • “What do you think this means?”
  • “Is there another way we can understand this (concept)?”
  • “Can you tell me what this means in your own words?”

It might also mean that extra modeling or concept reduction is needed.

Stay in their zone and guide them through the lesson without jumping to a new concept. Be careful not to look at the world or other homeschool families; just your student and their needs. It’s okay to take extra time on a concept. Success is the goal!


Did you benefit from this article?

Would you consider a small donation to support the ongoing work of SPED Homeschool?

Click Here to Donate Today


Cammie Arn

In my own family, I often find it difficult to see progress in the goals we have set. So, instead of just celebrating large goals, we make it a point to celebrate every triumph our children have on a daily basis.

In your own homeschool, how often do you recognize the little things your children do that are smaller parts of a larger goal? Learning letters means a child is one smaller goal closer to learning a word. Moving a limb means a child is one step closer to using a communication board.  Making a pot of macaroni and cheese means your young adult is that much closer towards establishing independence.

Whatever your goal is for your child, be sure to recognize the small things they do every day. My husband works within the public school system and his school has developed a way of recognizing students “caught being good.”  These “good” behaviors are the little things the school has determined to reward so students eventually learn the value of multiplying good behaviors.

“Collecting pennies means eventually those pennies will add up to a dollar.”

In a way, each good behavior rewarded by my husband’s school, and each smaller goal we reward in our homeschools, is like saving a single penny towards a larger investment. Collecting pennies means eventually those pennies will add up to a dollar. Slowly, but surely, little things add up to BIG things.

Affirmation for good behavior, wise choices and good school performance can leave your child with a healthy sense of accomplishment, and you with the realization both of you are getting there…


One
Penny
At
A

Time.


Did you benefit from this article?

Would you consider a small donation to support the ongoing work of SPED Homeschool?

Click Here to Donate Today


I talk to many parents who are interested in homeschooling, but they don’t know where to begin.  Many of these parents have kiddos with significant intellectual, behavioral, physical and emotional special needs.  These are parents who have been advocates for their children their whole lives.  They have gone through countless doctor appointments, therapies, IEP meetings and accommodations to help their child to succeed.


Once we get to the bottom of their fears, the underlying issue isn’t that they are incapable of teaching their child, it is that they aren’t sure how to create “public school at home.”  


Homeschooling Teaching Secret
I want to let you in on a big secret: you don’t have to create public school at home!  Read that sentence again, because it truly is freeing.  You are not responsible for creating a whole classroom at your house.  


In our homeschool, the world is our classroom.  Because of the way that most of us were educated, we have a picture in our minds of what school is supposed to look like.  The picture may include things like lined-up desks, an American flag,  textbooks, workbooks, tests with fill-in-the-blank bubbles.  However, as homeschoolers we are free to let go of these constraints.  We have the privilege of teaching our child in their learning style and at their level.


“Out of the Box” Schooling Options
I have two children with a variety of special needs including:  Down Syndrome, Apraxia, Sensory integration disorder, and Mixed Receptive-Expressive Language Disorder along with  other needs.  I use many resources to teach them.  


We don’t tackle every subject every day, but here are some things I choose from:


 Math

Numicon math 

Touch Math

Rod and Staff

Teachers Pay Teachers

Lakeshore

Learning Resources

and many other places.  Sometimes we even tackle math by going around the house counting, adding and subtracting.  We also incorporate math into our cooking and shopping.  Math is everywhere!


English/Reading

This year we are trying to see how language rich we can make our home by using read-aloud books!  We have a couple hundred picked out for a variety of topics and some small units.

We absolutely loveRead Aloud Reviva 

To target phonics and sight words, I have made my own books (which I  offer on Teachers Pay Teachers) 

Traditional curriculum like Abeka 

And more creative curriculum like Happy Phonics 


Science/Social Studies

We are learning some of this through our fabulous read-alouds.  We are also enjoying nature walks and are going to attempt some nature journaling this year.  My girls also love videos and tend to remember things with catchy songs or tunes. My girls love:

Rachel and the Treeschoolers 

Sid the Science Kid

The Magic School Bus

Liberty Kids

For Social Studies I purchased “.” They are not quite interested yet, but I’m holding out hope for it.  We also do a lot of map puzzles geared toward geography and use some iPad apps.


Sign Language

We love Signing Time 

While one of my daughters uses it for communication, my other daughter is learning it as a second language.


Occupational Therapy

Right now we do OT at home with things that I set up for the girls.  We  work with clay, painting, push-pin work, and coloring. This year I’m going to introduce some felt sewing and embroidery.  The girls love to watch me crochet and they want to learn, so we may attempt that as well.  


Last year was a monumental year for fine motor improvement.  I fell in love with coloring again and they wanted to join me.  I cannot pay them to do handwriting worksheets for more than 15 minutes,  but if I get out my coloring books they will color for 3-4 hours at a time.


Physical Education

They play outside!  They run, they swing, they jump on the trampoline.  We explore different parks when we have good weather and they love it.  


We target many skills and goals by shopping, cleaning, running errands and visiting with friends.  Life is about learning.  If you look at your daily activities, you will find that your children are learning so much from you.  Don’t be afraid to jump outside your box, try something natural, fun and child-led and see how your children blossom. 


Did you enjoy this article?

Would you consider a small donation to support the ongoing work of SPED Homeschool?

Click Here to Donate Today