By Amy Vickrey, MSE

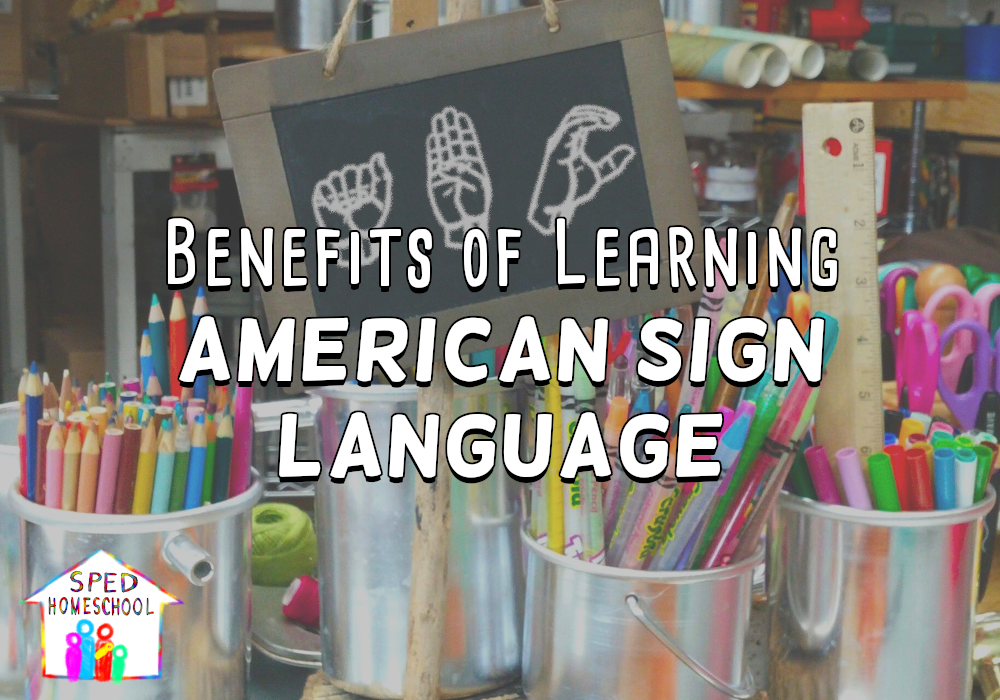
American Sign Language is a beautiful and useful language to know. I have used it many times in my adult life to communicate with parents, customers, and friends. There are many benefits to learning a second language, and ASL is quickly gaining in popularity because it is visual and hands-on! It is currently the fourth most popular foreign language taken in college! Basic knowledge of a signed language can be an important tool for firefighters, police officers, and other professional civil servants, as well as scuba divers, stock traders, and more. 

Check out some more of the benefits:

  • Reduces frustration – helps with communication when words are difficult
  • Increases self-esteem – students feel successful and helpful
  • Enhances language and listening skills – students learn to watch and listen in order to respond
  • Enriches relationships – can be fun and exciting to communicate in sign language
  • Increases IQ – second language learning activates parts of the brain that are only activated by using a second language
  • Facilitates bilingual learners – the sign for “bird” or “turtle” is the same no matter what language you speak!
  • Improves spelling – finger-spelling provides a hands-on, visual way to learn and work on spelling words
  • Improves motor skills – signs cross the mid-line, work on fine motor tasks through finger-spelling, and help develop and activate multiple parts of the brain
  • Builds overall communication skills – ASL is an expressive language that requires paying attention to not just what is said but the facial expressions that go with it
  • Builds better vocabulary – since we tend to use our bodies to talk and communicate anyways, sign language builds on that natural tendency and helps to reinforce vocabulary


Do you homeschool a child who is nonverbal? Make sure to check out our Pinterest board filled with ideas on how to teach a nonverbal student or for more information about ASL check out these links:
5 Ways Sign Language Benefits the Hearing
Top Benefits for Learning Sign Language
7 Benefits of Sign Language


Did you benefit from this article?

Would you consider a small donation to support the ongoing work of SPED Homeschool?

Click Here to Donate Today


By Amy Vickrey, MSE

The first post in this series on writing an IEP covered the things you should do before you start. Once you have followed the four steps she outlines, you are ready to consider what goals and objectives you want to focus on for your child. For some children, these goals will be the main focus of an entire subject or area of weakness with other topics in that area playing a more minor role. For others, these goals will be the whole focus for that entire year. 

Let’s start by looking deeper into what the difference is between a goal and an objective.

Goals
A goal is the intended outcome of what you want to achieve for each area of weakness. Ideally, you want 3-5 goals focusing on the most important areas or the areas of greatest need. The best goals follow the SMART goal formula:


SMART IEP goals are
:
Specific
Measurable
Use Action words
Realistic
Time-limited

 
Objectives
Objectives are the steps you take to reach your goal. They take the big goal and break it down by time or by skill.

Let’s look at an example:

Handwriting goal: John will write his name, with correctly formed letters, in the correct order, 3 times over a week.

Objective 1: John will use playdoh, art materials, and manipulatives to create the individual letters to spell his name, using a visual prompt, 3 times over a week.

Objective 2: John will write the individual letters, J, O, H, and N using correct form, 3 times over the week.

Objective 3: John will use playdoh, art materials, and manipulatives to create the letters to spell his name correctly, using a visual prompt, 3 times over a week.

You can see how these objectives build on each other, so that by the time John completes the last objective, he is ready for the final goal of writing his name correctly.


Objectives or Not?
Whether to include objectives is really dependent on personal preference and the individual goal. It can help provide focus and direction on the steps and skills leading up to a goal. Goals can be used for any academic or life skill area (like learning a math or toilet training). 

Now that you know how to write goals, you should be able to have a more focused and purposeful school day. The next article in this series will focus on helping you track progress so you know when to change the goal or make a new one. 


More Resources
Check out our  IEP Pinterest board or these links for more ideas:

Setting Annual IEP Goals:  What You Need to Know 
IEP Goal and Objective Bank
IEP Goals and Objectives – 1000s to Choose From
Creating SMART IEP Goals and Objectives


Did you know SPED Homeschool is 100% donor funded?

Donate today


By Amy Vickrey, MSE

With summer comes thoughts of outdoor activities and fun. For those that live in states where there is snow and ice for many months out of the year, it is a time that allows for nature and exploring that is otherwise unavailable. For those in the south, some of these activities could be enjoyed year round. Whatever your timeframe or location, here are some activities to consider as you start planning out your summer.

  • Stargazing – This can either be done as part of a unit study or as just a night or two to lay under the stars and look at the sky.
  • Camping – This may go along with stargazing or just on its own. There are a lot of life skills, science, and history lessons that can go with camping.
  • Fishing – Learn about the types of fish that live in your area, catch and release, or learn to cook and clean as part of life skills!
  • Nature walks – There are an abundance of local, state, and national parks in many areas that allow for nature walks and exploring. Some offer campsites and other amenities.
  • Play hide-and-go-seek – Do this either during the day and at night!! Talk about how different animals use different techniques to “hide.”
  • Watermelon seed spitting contest – (Okay, this may not be totally educational, but you can measure the distance!!)
  • Feed the ducks at the local pond.
  • Fly kites – There are several different online tutorials if you decide to make one instead of buy one.
  • Write or stage your own play.
  • Create your own “movie” – There are lots of editing software out there for free or that are inexpensive.
  • Bicycle ride – Whether you go around the neighborhood or at a local park this can be a lot of fun.
  • Plant things – Grow a garden (you can use various containers), plant trees, flowers, etc.
  • Study different birds, butterflies, etc. for your area – You can even plant specific plants to attract them!
  • Camp inside (the cousins do this at our house regularly) – Put out the sleeping bags, make some snacks, and watch some movies!!
  • Eat popsicles outside! Talk about why they melt so quickly (if they don’t eat them first).
  • Sidewalk chalk to draw, do math, write spelling words, etc.
  • Have a picnic at the local park or in your yard.
  • Play sports and simple games outside.
  • Pick summer wildflowers, press them, and make art with them (make sure they are not protected – in Texas it is illegal to pick bluebonnets, for example).
  • Create (you can even have the kids design it on graph paper) an obstacle course or mini golf course.
  • Listen to a book on tape or have a read-aloud outdoors.
  • Visit the farmers market in your area.
  • Take writing outside! Use a notebook or clipboard for convenience.


Enjoy the time outside this summer! Taking the learning outside creates a wonderful, fresh approach to the many skills we work on year round! Enjoy the warm weather!

For more activities check out our Pinterest board or the following links:
Summer Fun Ideas for Kids and Parents
Cheap Kids Summer Activities
Summer Activities for Kids

Did you know SPED Homeschool is 100% donor funded? 

Your contributions keep our ministry running! 

Donate today on GuideStar

(all donations are tax-deductible)


Did you enjoy this article?

React, share, and comment with the tools below


By Amy Vickrey, MSE

Summertime can mean it is HOT!! While outdoor activities are popular, what happens when it rains or the weather becomes too hot to be outside? How can we change things up to make being inside more interesting? What kind of field trips can we plan that will be successful?

Hands-on learning is so important at any age, and field trips are a great way to experience that! 

Here are some ideas for some field trips that your kids will look forward to:

  • Visit a farmers’ market
  • Visit a museum
  • Visit the zoo or aquarium
  • Visit your local fire station (call ahead)
  • Visit with your local police station (call ahead)
  • Go to the park
  • Explore local hiking or bike trails
  • Check out summer library activities
  • Carnivals or county fairs
  • Go to the flea market or garage sales
  • Play miniature golf
  • Go roller skating or ice skating
  • Eat at an old-style diner with a counter
  • Visit an ice cream shop
  • Go to the matinee at the movie theater
  • Visit a free “introductory” class for gymnastics, swimming, or karate
  • Look for free activities at Home Depot or Lowes (some require pre-registration online)
  • Check out Vacation Bible School classes at local churches
  • Visit local bakeries
  • Visit smaller theme parks (Here we have Morgan’s Wonderland and ZDT’s Amusement Park, both of which are less expensive than big name places like Seaworld)
  • Indoor gyms such as Rock the Spectrum Kids’ Gym

If indoor or at-home activities are more your family’s style, try some of these:

  • Have a reading day – read books or listen to books
  • Have a board game day
  • Build forts and tents
  • Make ice cream 
  • Make a bird feeder or bird house
  • Make homemade pizza (either with homemade or store-bought crust)
  • Make your own popsicles
  • Read joke books or create your own jokes
  • Create your own movies
  • Create your own photo creations using publisher or PowerPoint
  • String beads (use alphabet beads for spelling words or to practice name)
  • Build Lego (or other blocks) castles
  • Have a building “contest” to see who comes up with the best design – multiple awards available! Most creative, biggest, or wildest
  • Make oven smores (place graham crackers on a sheet pan, put chocolate on top and marshmallows on half of them, place under broiler until marshmallows start to turn golden brown, make sandwiches, and enjoy!)
  • Have a pajama party – put on pajamas early, make snacks, and enjoy favorite or old movies!
  • Play with cardboard boxes or baskets – they can be cars, trains, or many other creations!


Hope you have a good time this summer incorporating some new field trips or having some indoor fun!


Check out our Pinterest board or these links for more ideas:
8 Fun Indoor Activities for Hot Summer Days 
50 Indoor Activites for Kids on a Rainy Day
14 Indoor Activities to Help You Beat the Heat


Did you enjoy this article?

Support the ongoing work of

SPED Homeschool

Donate Today


By Amy Vickrey, MSE

As summer is in full swing, we start thinking about water fun and water activities. But what if we are in an area with limited water resources or, like my family, limited financial resources? There are many options to incorporate water play both indoors and out no matter what resources, or lack thereof, you have to pull from. 


Ideas for Incorporating Water Play into Your Summer:

  • Use a bucket or Rubbermaid tub to create your own “water table”
  • Use plastic cups, funnels, bath squirter toys, etc. to work on pouring from one container to another (great for building writing muscles)
  • Add hand soap, gentle dish soap, or food coloring for additional fun
  • Add letters or numbers to your “water table” for letter identification or spelling activities
  • Write words, letters, numbers (or anything else!) on the bottom of rubber duckies or other floating toys for water learning
  • Do a “car wash” and wash bikes and other ride-on toys
  • Use spray bottles or squirters with colored water to “draw” or “write” spelling words, letters, or numbers
  • Add food coloring to a bottle of bubbles and blow bubbles on paper for beautiful, creative art work
  • Cut sponges into strips and tie them together with string to create “balls” that can be used for fun water play games. Use a bucket to hold the water for your game
  • If outdoor is not an option, you can add letters and numbers to bath time and allow for additional time to play games with them in the bathtub
  • Water bag pinata – fill the bag (a grocery bag if you want to reuse/recycle) with water and enjoy the shower it gives when it breaks!
  • Water balloon ___________ (fill in the blank with your favorite sport). I’ve seen baseball, volleyball (with hands or with sheets), and tennis, but you could do any sport you wanted.
  • Play in the rain (make sure there is no lightning or thunder in the area to stay safe)
  • Go kayaking or canoeing
  • Visit the local swimming pool or splash pad
  • Make your own rain with the hose or sprinkler (follow any water restrictions for your area)


I hope you enjoy some fun in the sun this summer (or just some water play indoors) and remember play is an essential part of learning!! Have a great summer and pass the sunscreen!

 Check out our Summer Pinterest board or these other resource links for more ideas:


Did you enjoy this article?

Support the ongoing work of

SPED Homeschool

Donate Today


By Amy Vickrey, MSE

As I finish my first year of homeschool with my 6-year-old, soon-to-be “First Grader,” I am looking over the last year at all we have accomplished, and I am amazed. Just an hour or two of work most days of the week has helped him learned to read, do simple addition and subtraction, and begin into the writing process when he wasn’t even writing his name when we started. I know that even more important than meeting these goals is keeping one big goal in mind: the goal to create in my son a LOVE of learning.

I want him to become a LIFELONG LEARNER!

What does this mean? I want him to love seeking out new information and new knowledge, to never stop growing and learning. To have the tools to seek out information he wants to know.


Choose to Be an Example to Follow
To create a life-long learner, I must first be a lifelong learner myself. Children learn through examples. Here are some resources about how and why to become a life-long learner, even as an adult:

Why You Should Strive to Be a Lifelong Learner
Continuing to educate yourself can help you be more successful on the job and in business.

Learning is Good for Your Health, Your Wallet, and Your Social Life
Learning keeps your mind and body healthier, helps you create better spending habits and earning potential, and helps you become a better socialized and able to socialize person.

How and Why to Become a Lifelong Learner
Lifelong learning develops leadership potential and helps unlock skills throughout life that are not developed in the younger years.

If you are reading this blog, you probably are or are wanting to be a lifelong learner already! As a lifelong learner myself, sometimes it is still difficult to get my child to see the bigger picture of continuing to learn and grow throughout life. So I work to equip my son with tools to help him reach this goal. These tools include:

1 – Encourage the Love of Reading
With the ability to read comes the ability to learn anything. In today’s society, I would add the ability to use a computer too. We are blessed with computers that can read to us and help us with the reading and learning process. A love of reading helps make this an enjoyable experience and a desire to reach out and learn more.

2 – Handle Mistakes as Opportunities to Learn
The simple truth is everyone makes mistakes. It’s how we react to those mistakes that define us. Learn from mistakes; learn together; show how you learn from your own mistakes and help your children learn from theirs. Natural consequences are so powerful, especially when children are young. It is so much more powerful to teach a child how they got an answer wrong than to just mark it wrong.

3 – Teach Skills on How to Find Answers
When my son asks me a question I don’t know the answer to (or sometimes I do), I show him how to look up the answer on the computer, in a book, through Google, and other resources. I let him see me asking questions about things I need to learn. How to find answers is a powerful tool. It goes along with reading and a love of reading. I may not know the answer, but I know how to find it, and how to know if my source is credible.

4 – Allow Choice in Learning
I think this is the essence of homeschooling. The ability to give children the ability to have a choice in what they are learning. At my son’s young age, this means I provide books, games, and other materials on topics he likes or might like, and I let him explore them in his free time. About the time he thinks he has exhausted the bookshelf, he finds something new to explore. We go to the library, and I let him talk to the librarian about subjects and topics he is interested in. We explore TV shows and documentaries together about topics he loves. I have learned more about dinosaurs in the last year than I thought possible. But it’s what he loves and he is learning too.

5 – Provide Time for Play
Play is such an important part of the learning process. It is when children take information and make it their own. It is when they learn to seek out answers and take chances. To read more about play check out my April blog, Learning Through Play.
 
6 – Teach Goal Setting
Setting educational goals together can be a powerful tool to get your child engaged in the learning process. Start with small goals and build to bigger goals. Maybe your goal is to write your child’s name or to identify the first letter of their name. Make the goal together, work on it together, and when you accomplish it, CELEBRATE! To learn more about goal setting and healthy habits, check out The Leader in Me, 7 Habits of Happy Kids!

7 – Make Time to Celebrate
Celebrate the successes, whether big or small! When my son first started out working on sight words, we celebrated with a trip to the ice cream shop anytime he accomplished his goal. Now he is reading almost anything he picks up! By celebrating, it helped to create excitement and enjoyment. This is an important part of the process.

I hope you enjoy the journey as much as I am!

For more information on lifelong learning, check out these links:
6 Lifelong Learning Skills
5 Steps to Developing a Lifelong Habit of Learning
10 Simple Ways to Engage in Lifelong Learning

We at SPED Homeschool also want to help you keep growing and learning. Make sure to visit our website for new articles; our YouTube channel for new videos; and our Facebook page and  support group for lots of interactive training and support so you can keep learning new ways to teach your struggling learner.


Did you know SPED Homeschool is 100% donor funded?

Please consider donating today


By Amy Vickrey, MSE

I am not a handwriting expert nor an occupational therapist; however, in my 11 years in the classroom and in teaching my own son, I have learned many things about teaching a child to write. A lot of people worry about which hand their child should use. And the answer is….whichever is most comfortable for him/her. To begin with, I work really hard when a child is little to place objects in the middle to allow the child to determine on their own which hand to use with a tool. This allows a child to develop their own sense of handedness.

As a teacher in PreK classrooms in multiple states and settings, I always worked to allow and encourage children to experiment with using both hands to do activities. Most children pick a dominant hand between the ages of 4-6. However, my own son, who is now 6 ½, still has not picked a dominant hand. While he is right eye and right foot dominant, he still has not picked a dominant hand. Knowing that we have a family history of left-handed and ambidextrous people on both sides of the family, I decided to work with him on developing his left-handed writing and cutting skills as he seemed SLIGHTLY more proficient with his left hand. However, when I did this, I did not consider the accommodations he would need to be left-handed in what is essentially a right-handed world. As a result, I have had to learn to make some accommodations and changes to curriculum as well as visuals we use.

Simple Changes that Make a Big Difference
When I made my son’s first school work checklist, I put the checkboxes on the right. That’s where I, as a right-handed person, would have wanted them so I can see what I am checking off.


Soon, I realized that for my left-handed son, this was not going to work. So I tried to modify it to see if it helped…


However, my son, who is ASD, took issue to the fact that I was modifying his schedule to create boxes on the “wrong side” as he saw it. So the following week, we started with a new checklist, including a new picture picked out by my son…


Left-Hand Accommodations Expanded
In talking with other parents about accommodations they have made for left-handed children, simple things such as binding a notebook on the right instead of left-hand side can make a big difference.


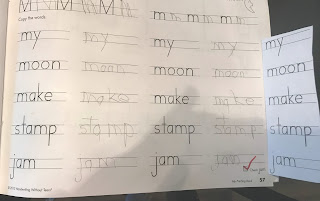
When we do handwriting, sometimes the way they set up the page doesn’t work for my son, so I copy the page, cut out the list of words and tape them along the side so he can copy from the right instead of the left.


I also learned to stop and think about the shape of writing tools. I bought some awesome rock crayons from a company started by an Occupational Therapist, only to discover that they lend themselves to right-handed individuals rather than left-handed. I was disappointed, but it made me realize that not everything is designed for left-handed use. I even bought left-handed scissors, which made a huge difference. Fiskars brand scissors can be used for either hand, but left-handed scissors are still more comfortable for left-handed use. Also, when we sit down to work together, I always sit on my son’s right side so his left hand is free to write and move without bumping into me.

More Information to Explore  
Want more information on how to determine handedness and how to accommodate left-handed students? Check out these links:


Left-Hand Teaching Help:
5 ways to support a Left Handed Student
10 Objects Left Handed People Struggle With
Teaching Left-Handed Children
Tips for Teaching Left-Handed Children to Write 

Determining Handedness in Kids:
How to Determine If Your Child is Left or Right Handed
Spotting a Left-Handed Child
Activities that Can Help Develop Handedness

And remember, the most important thing is how comfortable your child is with his/her tools. Play-doh, paper tearing, playing with stickers, pouring sand or water in and out of containers, and just scribbling are all important parts of building muscles for writing too. So have fun, and enjoy exploring handedness with your children!


Did you benefit from this article?

Would you consider a small donation to support the ongoing work of SPED Homeschool?

Click Here to Donate Today


By Amy Vickrey, MSE

There are days my son just needs time to play. As a homeschool mom, I feel accountable for his time during the day and ensuring that he is spending the time he should on “school.” So on the days when my son expresses a deep need to spend time engaged in play, I have to remind myself that play is learning too. Whether by himself or engaged with other children, my son is learning from his interaction with toys, his brother, cousins and friends.

Specific Skills Learned Through Play
There are many skills that are learned through play. From playing with blocks to pretending and playing with friends, the skills learned while engaged in play are beneficial to any child. Our special children need to be engaged in play even more! For a child like mine, who develops social and other skills at a slower rate, play is so important to reinforce his skills and teach him new ones as he is ready to learn them. Take a look at the kinds of things our kids are learning through play.

Social Skills: Sharing, turn taking, negotiating, compromising, and leading or following

Physical Skills: Fine motor (in preparation for or to reinforce writing skills), large muscle, spatial awareness

Language and Literacy Skills: Phonological awareness (how sounds make up words and are used in words), conversation skills (taking turns, responding appropriately, discussion between character toys), communication skills (expressing desires and needs), new vocabulary they need for play with a certain toy

Cognitive Skills: Math, problem solving skills, science skills (physics), trial and error, learning how to make it better the next time

Self-Esteem: Show accomplishments and abilities, trying out new things without feeling pressured, relating accomplishments to peers or adults nearby (“See,” or “Look at me”)

Preparing for Life Ahead: Learning independence, thinking, making decisions, cooperating/collaborating with others, problem solving, goal setting and accomplishment

Social Developmental Stages of Play
As children grow and develop, the way they play changes. Each of these stages are important and children must grow through these stages at their own pace. There are ways to help them grow into the next stage if a child has difficulties.

Unoccupied Play: When a child is busy playing but they are not engaged with any people or toys, and the play appears random.

Solitary Play: Playing with a toy by themselves and not being interested in the toys or activities of others.

Onlooker Play: The child watches others play but does not join in the play.

Parallel Play: The child plays side-by-side with other children, with the same toys, but does not interact with the other children.

Associative Play: The child plays with other children, but they do not share a common goal.

Cooperative Play: Play becomes organized into groups and teamwork, children learn to share the goal of the group and play by the group “rules,” willing to both contribute and accept others’ opinions.

It is fascinating to watch children grow and learn through these different stages, and the stages are important to learning how to work with others later in life. Even time spent in solitary play can help a child gain skills as they have their toys interact with one another, and they interact with their toys.


Supporting Your Child in Play

Learning how to play with your child takes time and practice, but it is fun and worth your while! Here are some suggestions for playing with your child:

Observe: Watch what your child is doing. What he doing well? What might he need help with? What are his favorite activities?

Follow: When you join in, follow along with what your child is doing, try not to “take over,” but to follow the rules and guidelines they set up

Be Creative: Don’t worry about looking “silly,” enjoy playing with your child! I have worn many things on my head or “drank and ate” many made up meals. Also, use toys in different ways to show new and unique ways to do something your child might not have thought of yet.

Ask Questions: Talk with your child about their play and make conversation. Just enjoy being in the world of your child for however long you have, even if it is just 5 minutes! A little time can make a big difference!

Make a Plan: When you transition to or play, have your child make a plan of what they are going to go play and how they are going to do it (“I’m going to build a house with blocks”), then help them get started on their plan. This teaches how to set a goal and accomplish it! Then, they can go on and play other things.

If your life is like mine, the time my children are engaged in play is about the only time I have for myself to catch my breath, wash dishes or prepare for the next subject in school. That time is important, but I also try to make time everyday to play! Have Fun!

Learn More About Play
Information from some of these sites were used in writing this article. If you would like to learn more about learning through play, we encourage you to check them out.

10 Things Every Parent Should Know About Play
3 Benefits of Learning Through Play
What Children Learn Through Play
Children Learn Through Play
Supporting Play Activities
Six Stages of Play: How Children Develop Social Skills
How Kids Learn to Play: 6 Stages of Development
Tools of the Mind

Also, make sure to check out all the great resources from SPED Homeschool on our YouTube Channel, Facebook, Instagram, Pinterest, Podcasts (on Podomatic/iTunes/GooglePlay), and Twitter.


Did you benefit from this article?

Would you consider a small donation to support the ongoing work of SPED Homeschool?

Click Here to Donate Today


By Amy Vickrey, MSE

I hear a lot of homeschool parents saying they feel like they are “cheating” when they give their child an answer or help them to find the answer. As a teacher from the public school world, let me tell you that teachers give answers and help students find answers on a daily basis in the classroom! However, teachers have been trained to use different language for this process of “answer giving.”


Helping is Training
In the world of sports, a specific movement has to be repeated at least 300 times perfectly to create the proper muscle memory. If any part is learned incorrectly during this process, it can take 1500 times to re-train those muscles in order to correct the error. In academic learning, and especially for our students who have special needs, the process is similar (the number of repetitions is not as high, although it might feel like it is). 

Errorless Learning/Teaching
For children who take time to learn skills in the first place, or who have a difficult time unlearning things that were learned wrong, there is a method of teaching that helps eliminate the possibility for things to be learned incorrectly. It is called “Errorless Learning/Teaching.”

This method is usually done through a series of prompts, or “hints” that become less as the student becomes more independent at the task. Independence is definitely our goal! If a child struggles, you go back to a higher level of help, then begin to back off again. Here are six ways this type of teaching might look like:

1 – Full Physical Prompt
With a full physical prompt, you would guide the student’s hand, arm, leg, etc to complete the task fully. If the student is writing the letter “C,” you would place your hand over theirs and guide their hand through the process of writing “C.” This is also referred to as “hand over hand.”

2 – Partial Physical Prompt
This would be used to get your student started in the right direction, but the student completes the task on his/her own. If the child is presented with a letter “C” and an “A” and you ask the student to hand you the “C,” you might tap his/her hand in the direction of the “C” but allow the student to pick it up on his/her own.

3 – Modeling
Modeling is done by doing something first and then having the student try. For example, when my son draws a letter “p,” I would first draw the “p”, then have him draw it based on what I drew. Modeling is used a lot in teaching, no matter what the ability level of the student. Basic teaching is a lot of modeling and then having the child try.

4 – Gesture
A gesture could be drawing the letter “p” in the air or indicating a part of the paper or book where the child can look in order to find the answer independently.

5 – Direct Verbal Prompt
If your child was given a two-step direction: “Pick up the paper and throw it in the trash,” a direct verbal prompt would be to then give each step as they are doing it. First, “Pick up the paper,” and after they pick it up say, “throw it in the trash.” As a pre-k teacher, I would give instructions to the whole class such as “put your jackets in your backpacks,” then generally repeat it 20 times to each child individually to ensure they did it, especially at the beginning of the school year.

6 – Indirect Verbal Prompt
Teachers use a lot of indirect verbal prompts in the classroom. This is where questioning comes in, such as asking, “What’s next?” or “What else?” The psychologist Vygotsky is well known in the teaching world for his work on Scaffolding. This is a great tool for teaching any child because it helps them think through the steps. When I am doing math with my son, and he is solving an addition problem, I might ask him, “What’s next?” in the problem he is working on. I will also use indirect verbal prompts to help him stay on task when he is having trouble focusing.

Independence is the Goal
This is our goal in teaching any child. Our aim is for our children to be independent and have complete mastery of the skills we are striving to teach them. Mastery is the point at which they can complete a task completely by themselves, with no questions, no “hints,” and no prompts! When they reach this point, we know they truly understand!

How to Document IEP Goals That Use Prompting
As a special education teacher, when I wrote goals, I always wanted my students to be and feel successful from the beginning so I would write the goal to include prompts. (Download our free IEP template and check out this resource page to learn more about writing your homeschool student’s IEP.)

For example:

“John will write his name, using 0-3 prompts, successfully in 2 out of 3 trials.”

From this goal, I would have John work on writing his name. At first, I would start with hand-over-hand. Next step would be my writing it as a model for John. Next, I might form the letters in the air as he wrote them on paper. Then I might remind him directly of the letters, and then move to asking him, “What’s next?” Finally, with time, he would write his name independently. As we moved through each phase, I would make a notation on the paper each time we wrote his name and what I did to help him be successful. That way, I am able to track the progress he is making and how independently he is writing his name.

As parents, we know that our students receive assistance when they are in the classroom, but it is hard to know how much to give at home. I think at times we hold ourselves to a higher standard because we don’t want to get it “wrong.” Just know that there is no wrong way to do it. The most important thing is to document – write it down – so you know how much progress has been made and how much your child has grown!


Did you know SPED Homeschool is 100% donor funded?

Donate today


Amy Vickrey, MSE

When it comes to grading, there really is no wrong way to do it. However, you may not be familiar with different strategies that are available and used in schools to grade students of different abilities. The key to selecting a grading strategy is BEGIN WITH THE END IN MIND!

What is your goal for the assignment? Is it mastery? Is it to learn how to complete an assignment independently, regardless of errors? Or is it about the process and the details more than the overall finished product? While there are probably as many ways to grade as there are teachers on our planet, here are some common ways to consider.

Checks and X’s: The “Traditional Method”
There is a time and place for traditional grading. Teachers from Elementary to College professors use this method to see what students know and what they don’t. Grades are usually displayed as a percentage (calculated by a number of questions correct divided by a total number of questions, then multiplied by 100); examples would be a 96 or 85. It can also be displayed as a fraction of number correct over a total number of problems (16/20).

This is useful in a subject that is straightforward or during high school years on curriculums that lend themselves to such grading. It also tends to be a quick and efficient method for teachers in calculating and maintaining grades. You can always change it up and use stickers or smiley faces instead of checks if you are using this method for younger students!

Grading to Mastery
One method I have used in the past for a class of Fourth Graders was grading to Mastery. Any questions they were incorrect on, I would circle or otherwise indicate in ink and have them correct them. My goal was for them to come up with the right answer on their own.

If after correcting it, they were still wrong, I would do a quick re-teach and have them try again. If they were still wrong, we would go through it together. I would indicate on the paper each time we had to go back over it so that I could track their progress and level of support needed. Meanwhile, they were pleased that they (eventually) came up with the right answer and got it “right.” This method is especially good for children who get frustrated or upset when something is marked wrong.

Checklist
A checklist is really great for younger kids or children who need things listed very specifically. For example, maybe your goal is for your child to complete 3 math problems independently, put their name on their paper, and turn it in to a certain spot or folder. Your checklist would look something like this:

Did you remember to….
Yes
No
   Write your name on your paper?
   
   Answer all three questions?
   
   Write neatly?
   
   Put your paper in the red folder?
   

The idea of the checklist is the student can independently complete work when they know what the expectations are ahead of time. It also serves as a visual reminder during the work process to keep students on track for assignments and projects.

Rubrics
Rubrics are a lot like checklists but can leave more room for originality. They are great for projects that cover multiple subjects, grading projects that don’t lend themselves to traditional or mastery grading, or even a checklist. There are a lot of resources for rubrics, including:

  •  teachnology: Offers a large collection of pre-made rubrics, especially for grade school subjects and activities
  • Teacher Planet: Rubrics 4 Teachers: Lots of pre-made project rubrics, plus a very simple rubric building tool for making simple custom rubrics
  • Project Based Learning: Checklist Developer: A checklist approach to a grading rubric
  •  edtechteacher: Great rubrics for high school-level work including bloging, video, coding, and media projects, as well as many links to other rubric development material
  • RubiStar: is a tool to help teachers (and parents) who want to use rubrics, but do not have the time to develop them from scratch.

Whichever method you choose, or if you create your own way of grading, making your expectations clear to your student and keeping your end goal in mind are key to making your grading meaningful. When working on my Masters, I once read an article that stuck with me. The point made was that students who had answers marked wrong improved less quickly than students who also were given the correct answer or shown how to correct it. The biggest benefit of homeschooling is we get to “make the rules,” and that includes being able to reteach a topic until it is truly mastered if that is what is needed!!!

Special thanks to Shannon Ramiro and Peggy Ployhar  for sharing examples and resources to make this article possible.


Did you know SPED Homeschool is 100% donor funded?

Donate today